

Repairing Vinyl Flooring: A Complete Guide
- PVC Master
- Jan 28
- 3 min read
Vinyl flooring is a popular choice for many homes and commercial spaces due to its durability, affordability, and ease of maintenance. However, like any flooring material, it can suffer from wear and tear, scratches, dents, or even water damage over time. Knowing how to address these issues promptly can save you money and extend the life of your floors. This guide will walk you through everything you need to know about repairing vinyl flooring effectively.
Understanding the Basics of Repairing Vinyl Flooring
Before diving into repairs, it’s important to understand the types of vinyl flooring and the common problems they face. Vinyl flooring comes in sheets, tiles, and planks, each with its own repair methods.
Sheet vinyl is a continuous, flexible sheet that can be tricky to patch but is great for waterproofing.
Vinyl tiles are individual squares that can be replaced one by one.
Vinyl planks mimic hardwood and are often click-lock or glue-down.
Common issues include scratches, gouges, tears, lifting edges, and discoloration. Minor scratches can often be buffed out or covered with a repair kit, while larger tears or damaged planks may require replacement.
Tools and Materials You Might Need
Vinyl floor repair kit (includes putty, color compounds, and applicators)
Utility knife
Heat gun or hair dryer
Adhesive or vinyl glue
Replacement tiles or planks (if necessary)
Cleaning supplies (mild detergent, cloths)
Having the right tools on hand will make the repair process smoother and more effective.

Step-by-Step Guide to Repairing Vinyl Flooring
1. Clean the Damaged Area
Start by thoroughly cleaning the damaged area with a mild detergent and water. Remove any dirt, dust, or debris to ensure the repair materials adhere properly.
2. Assess the Damage
Determine if the damage is superficial or if it requires replacing a section. Small scratches or dents can be fixed with a repair kit, but tears or missing pieces might need patching or replacement.
3. Use a Vinyl Repair Kit for Minor Damage
For scratches and small gouges:
Apply the putty or filler from the repair kit into the damaged area.
Smooth it out with the applicator.
Use the color compounds to match the floor’s shade.
Allow it to dry completely before walking on it.
4. Repair Tears or Holes
For tears:
Trim any loose edges with a utility knife.
Apply adhesive under the torn vinyl and press it down.
Use a roller or flat object to smooth the area.
If the tear is large, consider patching with a piece of matching vinyl.
5. Replace Damaged Tiles or Planks
If a tile or plank is beyond repair:
Carefully cut out the damaged piece using a utility knife.
Clean the subfloor beneath.
Apply adhesive and place the new tile or plank.
Press firmly and allow it to set.
This method is often the most effective for extensive damage.
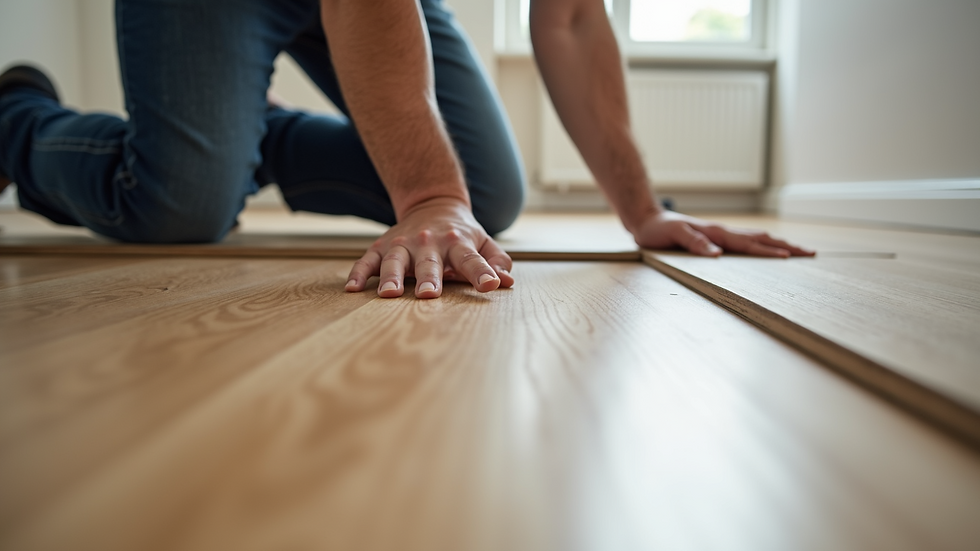
Can you replace just one plank of vinyl flooring?
Yes, you can replace just one plank of vinyl flooring, especially if you have click-lock vinyl planks or glue-down tiles. This is a cost-effective way to fix localized damage without replacing the entire floor.
Steps to replace a single plank:
Locate the damaged plank and clear the surrounding area.
Remove the damaged plank by carefully lifting it. For click-lock planks, you may need to unlock adjacent planks first.
Prepare the subfloor by cleaning and leveling it.
Install the new plank by clicking it into place or gluing it down.
Ensure the new plank is flush with the surrounding floor.
Replacing a single plank requires patience and precision but can restore your floor’s appearance quickly.
Tips for Preventing Future Damage to Vinyl Floors
Prevention is always better than repair. Here are some practical tips to keep your vinyl floors looking great:
Use furniture pads under heavy furniture to prevent dents and scratches.
Avoid dragging heavy objects across the floor.
Clean spills immediately to prevent staining or water damage.
Use mats or rugs in high-traffic areas.
Maintain a regular cleaning schedule with gentle cleaners.
By following these tips, you can minimize the need for frequent repairs.
When to Call a Professional for Vinyl Flooring Repair
While many vinyl flooring repairs can be done as DIY projects, some situations require professional help:
Extensive water damage or mold issues.
Large areas of peeling or lifting vinyl.
Complex repairs involving subfloor damage.
Matching and blending colors for large repairs.
Professionals have the tools and expertise to handle these challenges efficiently and ensure a seamless finish.
Final Thoughts on Maintaining Your Vinyl Floors
Regular maintenance and timely repairs can keep your vinyl flooring looking new for years. Whether you’re dealing with minor scratches or replacing a damaged plank, understanding the repair process empowers you to take action confidently. For more detailed advice and resources on vinyl flooring repair, consider consulting specialized guides or professionals.
Taking care of your vinyl floors not only enhances your space’s appearance but also protects your investment over time.


Comments